软件
- 综合
- 软件
- 文章
- 安卓
2012/11/9 15:57:32作者:佚名来源:网络
【实例名称】
用CSS+JS制作进度条(二)
【实例描述】
本例学习如何使用CSS+JavaScript的方式实现常见的进度条。
【实例代码】
<html xmlns="http://www.w3.org/1999/xhtml" >
<head>
<title>标题页-学无忧(www.xue51.com)</title>
</head>
<body>
<style type="text/css">
#divLoadCont{position:absolute; z-index:500;
 left:0; top:0; width:100%; height:98%;
clip:rect(0,100%,100%,0); background-color:white;
layer-background-color:white; }
#divLoad1{position:absolute;
layer-background-color:silver;
background-color:silver}
#divLoad2{position:absolute; left:0; top:0;
layer-background-color:navy; background-color:navy}
#divLoadText{position:absolute; background-color:transparent;
 font-family:arial,helvetica; color:Navy; font-size:14px; }
</style>
<script language="JavaScript" type="text/javascript">
function pro_bwcheck(){
//检测浏览器的代码-通用
    this.ver=navigator.appVersion
    this.agent=navigator.userAgent
    this.dom=document.getElementById?1:0
    this.opera5=this.agent.indexOf("Opera 5")>-1
    this.ie5=(this.ver.indexOf("MSIE 5")>-1 &&
this.dom && !this.opera5)?1:0;
    this.ie6=(this.ver.indexOf("MSIE 6")>-1 &&
this.dom && !this.opera5)?1:0;
    this.ie4=(document.all && !this.dom && !this.opera5)?1:0;
    this.ie=this.ie4||this.ie5||this.ie6
    this.mac=this.agent.indexOf("Mac")>-1
    this.ns6=(this.dom && parseInt(this.ver) >= 5) ?1:0;
    this.ns4=(document.layers && !this.dom)?1:0;
    this.bw=(this.ie7 || this.ie6 || this.ie5 ||
this.ie4 || this.ns4 || this.ns6 || this.opera5)
    return this
}
var bw=new pro_bwcheck()
numImages=12
//默认10个图片
loaderWidth=350
//设置进度条的宽度
currentImg=0
function pro_doc_size(){
//判断显示区域
  this.x=0;this.x2=bw.ie &&
document.body.offsetWidth-20||innerWidth||0;
  this.y=0;this.y2=bw.ie &&
document.body.offsetHeight-5||innerHeight||0;
  if(!this.x2||!this.y2)
return message('窗体的宽度和高度不够!')
  this.x50=this.x2/2;this.y50=this.y2/2;
  return this;
}
function pro_obj(obj,nest){
//定义页面中承载进度条的控件属性
  nest=(!nest) ? "":'document.'+nest+'.'
  this.evnt=bw.dom? document.getElementById(obj):
bw.ie4?document.all[obj]:bw.ns4?eval
(nest+"document.layers." +obj):0;
  this.css=bw.dom||bw.ie4?this.evnt.style:this.evnt;
  this.ref=this.css
  this.w=this.evnt.offsetWidth||this.css.clip.width||
    this.ref.width||this.css.pixelWidth||0;
  return this
}
pro_obj.prototype.moveIt = function(x,y){
//定义移动方法
  this.x=x;this.y=y; this.css.left=x;this.css.top=y
}
pro_obj.prototype.clipTo = function(t,r,b,l,setwidth){
//重新定义裁剪方法
  this.ct=t; this.cr=r; this.cb=b; this.cl=l
  if(bw.ns4){
    this.css.clip.top=t;this.css.clip.right=r
    this.css.clip.bottom=b;this.css.clip.left=l
  }else{
    if(t<0)t=0;if(r<0)r=0;if(b<0)b=0;if(b<0)b=0
    this.css.clip="rect("+t+","+r+","+b+","+l+")";
    if(setwidth){this.css.pixelWidth=this.css.width=r;
    this.css.pixelHeight=this.css.height=b}
  }
}
var oLoad2
function startLoading(){
  page=new pro_doc_size()
  //以下设置加载控件的一些基本属性
  oLoadCont=new pro_obj('divLoadCont')
  oLoad=new pro_obj('divLoad1','divLoadCont')
  oLoad2=new pro_obj('divLoad2','
divLoadCont.document.divLoad1')
  oLoadText=new pro_obj('divLoadText',
'divLoadCont.document.divLoad1')
  oLoad.moveIt(page.x50-loaderWidth/2,page.y50-20)
  oLoadText.moveIt(loaderWidth/2 - oLoadText.w/2,10)
  oLoad.clipTo(0,loaderWidth,40,0,1)   //裁剪区域
  oLoad2.per = loaderWidth/numImages   //百分比
}
function loadIt_display(ok){
  currentImg++
  if(oLoad2) oLoad2.clipTo(0,oLoad2.per*currentImg,40,0,1)
//裁剪显示的区域
  if(currentImg<=numImages) setTimeout("loadIt_display(1)",200)
//使用定时器不断加载图片
  else{
    oLoadCont.css.visibility='hidden'
//进度条加载完成后隐藏
  }
}
</script>
<div id="divLoadCont">
  <div id="divLoad1">
    <div id="divLoad2"></div><br>
    <div id="divLoadText">页面加载中,请稍候...</div>
  </div>
</div>
<script>
    startLoading()
    loadIt_display(1)
</script>
</body>
</html>
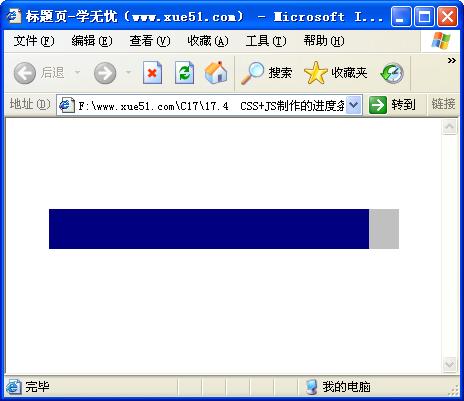
【运行效果】
【难点剖析】
本例的重点在于样式表中div层的布局。样式表设置div的背景色和边框颜色为蓝色,然后使用JavaScript计算进度条的宽度和每次显示的进度,其中重点是“clipTo”方法。本例重新定义了此方法,目的是实现一个矩形块状区域的显示。
【源码下载】
为了JS代码的准确性,请点击:用CSS+JS制作进度条(二) 进行本实例源码下载
标签: 进度条
相关文章
ip雷达 v5.0.2绿色版
详情WinSCPv5.15.1绿色中文版
详情filezilla client v5.5
详情wireshark中文版 v3.4.9
详情Boson Netsimv10.8破解版
详情风行播放器 v3.0.6.106
详情爱奇艺客户端 v10.1.0.6636官方版
详情搜狐影音 v7.0.19.0官方版
详情乐视视频 v7.3.2.192
详情华数tv客户端PC版 v1.1.2.0
详情cbox央视影音 v5.1.2.1经典版
详情软媒收音机(魔方) v1.13
详情倾听网络收音机 v3.0.0.0
详情魅影流声全球网络收音机 v1.0.0.1
详情酷狗电台 v8.2.75
详情暴龙网络收音机 v2.5.1
详情克莉2v1.0中文版
详情冬日计划v1.2中文版
详情刺客信条英灵殿v1.0吾爱破解版
详情刺客信条英灵殿终极v1.0免安装破解版
详情动物森友会v1.10.0最新破解版
详情哈迪斯杀出地狱v1.37中文破解版
详情嗜血印中文豪华版v1.0豪华版破解版 附游戏攻略秘籍
详情城市战斗v1.0中文破解版
详情尼尔人工生命v1.0steam免费破解版
详情尼尔人工生命升级版v1.0PC破解版
详情尼尔人工生命升级版v1.2247中文破解版
详情层层恐惧2中文破解版v1.0绿色免安装版
详情往日不再v1.0 steam破解版
详情往日不再v1.0pc破解版
详情救赎之路v1.0中文破解版
详情斯盖尔女仆v1.0中文破解版
详情
新盗墓笔记官方版v1.215.589730
详情
无尽的拉格朗日无限金币钻石版v1.2.267172破解版
详情
明日之后无限小太阳版v1.0.246安卓版
详情
双生幻想vivo版v6.6.83安卓版
详情
剑网1归来内购免费版v1.1.116安卓版
详情
模拟城市我是市长国际版v0.69.21342.22832安卓版
详情
迷你世界999999迷你币版v1.20.5破解版
详情
王牌战争无限内购版v9.7安卓版
详情
云上城之歌不氪金版v10.16安卓版
详情
王铲铲的致富之路破解版v1.1.8安卓版
详情
创造与魔法无限点券版v1.0.0505安卓版
详情
狩猎使命九游版v1.6.6.000
详情
魔镜物语变态版v2.1.4无限金币版
详情
黑月手游免费版v2.2.0安卓版
详情
曙光英雄v1.0.12.0.20无限钻石版
详情
原始传奇无限元宝版v1.6.806内购破解版
详情